THE HUTCH
- Hillary Walker

- Jul 20, 2021
- 3 min read
Updated: Jul 20, 2021
You guys. This is it. THE hutch. I posted just the picture (no blog, directions, nada) on Pinterest of the transformation and it has been viewed thousands [THOUSANDS] of times-insert mind blown emoji here-. I'm a nobody. Just a mom moving around the country with my active duty husband finding deals on Facebook Marketplace and making them my own.
The left is the actual photo from Marketplace. My husband was in training in Louisiana when I called him and told him I had fallen in love. Typical me. When I sent him the screenshot, he was less than impressed. "BUT it's only $100!" And in true Bobby fashion, he gave in and told me to get it. :) My friend's husband helped me load it in my truck and bring it home. I knew exactly what I wanted to do with it. Over the course of a week, new life was breathed in to her and my vision became a reality.

The counter portion was warped, had water damage, and sizable chips with pressboard showing through (I knew this going into it). I never intended on keeping that anyway, so I took it off. I took all of the hinges, doors, and pulls off and gave it a light sand, just enough so paint would adhere to it. I brought it in my kitchen (we live in Hawaii and wanted to avoid the humidity) and painted it with Behr's Chalk Paint in Grecian Garland. Two coats did the trick (roughly half the quart)!


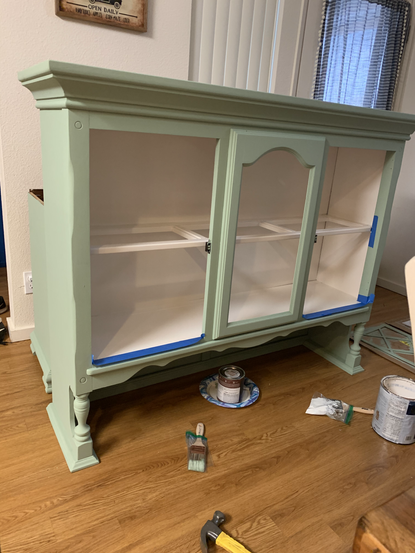


The inside of the hutch was painted with Benjamin Moore's Vanilla Milkshake in a satin semigloss (I had this leftover from another project). The inside was the HARDEST part. It took what seemed to be a gazillion coats. I'm not sure if it was the semigloss or just that the inside had such a dark base. Either way, I was glad when it was done! I gave the handles and hinges a good scrub in old fashion Dawn dish soap and water. I allowed them to dry over the course of two days just to make sure they were good and dry! Then, I sprayed them with Rust-oleum spray paint in Matte Farmhouse Black. I gave these a couple of coats too.
The butcher block--swoon. I bought a peice from Home Depot for about $148 (this was prelumber price spike!) and had my same friend's husband cut it to size. I didn't stain the butcher block. I love the look of the natural colors so I just sealed it with a waterproof wood sealant (my sealant is not kitchen/food safe because nothing gets prepared on this that we eat-if you are doing butcher block countertops, you need something that is food safe!).
I put her all back together and that was that! I did add remote controlled, stick-on, strip lighting that I picked up at the trusty TJ Maxx. I bought two boxes of 6 foot strips for about $14 and it was perfect! I peeled the backing off and stuck it to the inside top, closest to the doors, ran it down the sides, and under the hutch. Here are some similar ones. It gives the perfect amount of light, romantically illuminating my kitchen in the night.

I HAD to share a picture of her decorated at Christmas! (Here you can see the lights inside and under the hutch)

This make-over process was quick and easy. I loved every minute of it and love the result even more!

Comments